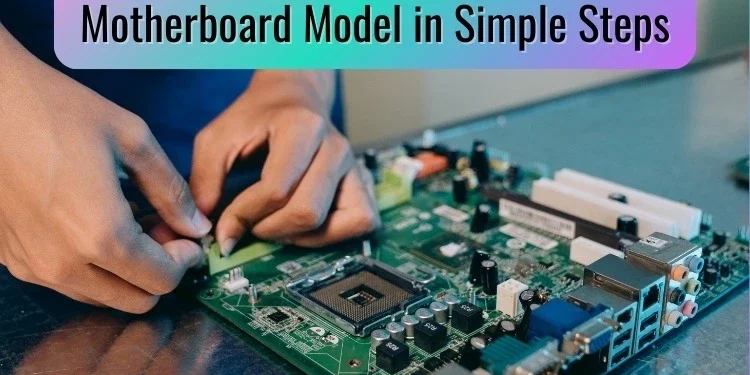
Motherboards are an essential yet often overlooked component of every computing device. Knowing which specific model powers your PC, laptop, or server can reveal its capabilities and limitations.
This guide outlines simple methods for determining your motherboard using built-in Windows utilities or hands-on inspection. By investing just a few minutes, you’ll gain valuable insight that can help optimize performance now and inform future upgrades.
Using Windows Command Prompt
The Command Prompt utility has been a part of Windows for decades, providing a primary interface for executing system commands. While its unintuitive design bewilders many users, a single line entered here swiftly retrieves essential details about your computer’s motherboard.
- To start, open the Start menu and type “Command Prompt” to find the application. Right-click and select “Run as Administrator” for full system access.
- These elevated privileges allow the subsequent command to gather low-level configuration information stored elsewhere.
- At the command line, type or copy-paste the following exactly as shown:
wmic baseboard get the product, manufacturer, version, serial number
The WMIC (Windows Management Instrumentation Command-line) tool taps into the Windows Management Infrastructure, querying the baseboard device that represents the motherboard. It returns a brief report listing the product name, manufacturer, firmware version, and individual serial number.
These identifiers offer insight into your hardware’s specifications and origin of manufacture. The product string mainly aids online research, pairing it with your manufacturer to explore technical specifications, driver updates, or compatibility with other components.
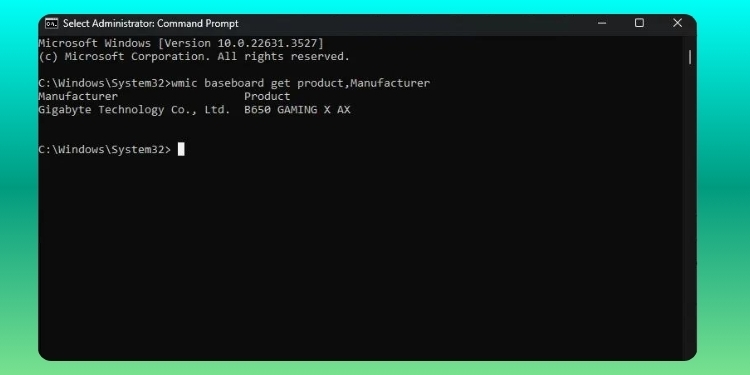
Image Source: Digital Trends
Should any field appear blank, don’t fret. Some older systems may lack specific details stored in their firmware. Even partial results still serve their purpose of giving you a solid lead to identifying your motherboard model.
With its simple one-line interaction, Command Prompt delivers the goods for essential motherboard identification directly from Windows. Don’t be intimidated by its austerity – this utility remains a handy problem-solving ally.
Using Windows System Information
As an alternative built-in tool, System Information presents your computer’s attributes in an easy-to-browse graphical interface. While sometimes less reliable than Command Prompt, browsing here requires no specialized commands.
- To access it, press Windows+R to open the Run dialogue.
- Type “msinfo32” and hit Enter to launch the application quickly. Alternatively, search for “System Information” from the Start menu.
- The initial view splits into a System Summary panel and a main report window. Focus first on the condensed rundown of details shown on the left.
- Scroll in this section to locate the “BaseBoard” entry between other components.
- Beneath this header shows attributes like the “BaseBoard Manufacturer” and “BaseBoard Product” fields explicitly listing the motherboard vendor and model identifier. Jot these down for your records.
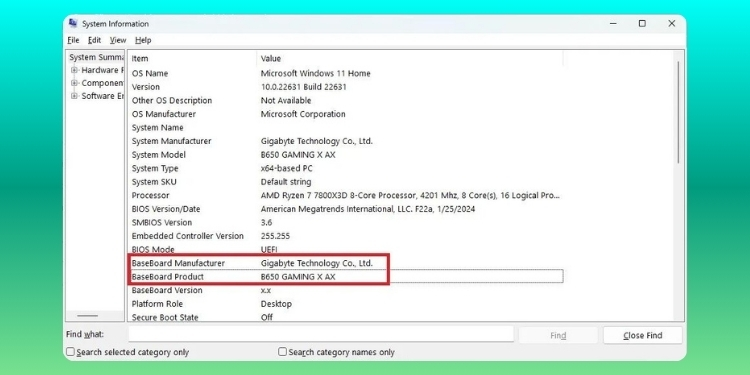
Image Source: Digital Trends
Don’t lose hope if any value appears blank or generic. System Information sometimes omits or truncates information, depending on your configuration.
For a complete picture, switch to the main report on the right-hand side. Expand the “BaseBoard” category and scrutinize the expanded details encompassing your board’s make, model number, firmware revision, and other finer points.
Admittedly more cluttered than Command Prompt, System Information gives a holistic hardware overview. When upgrading or troubleshooting in the future, refer back to certain specifications.
Using Third-Party Software
When pre-installed OS tools fail, dedicated third-party applications designed for the task often plug information gaps. CPU-Z is a reliable freeware favorite that is relied upon by hardware enthusiasts and professionals alike.
- Head to cpuid.com/softwares/cpu-z.html to download the latest version for Windows, which is compatible with all editions from 7 onwards. Run the installer and launch CPU-Z once finished.
- Its interface splits into multiple hardware-focused tabs along the left pane. For motherboard data, select the appropriately named “Mainboard” tab.
- More diligently designed than Microsoft’s offerings, CPU-Z presents clean segregated details on your board’s manufacturer, model number, and chipset under corresponding headings up top.
- Scroll further to view a wealth of supplementary specifications.
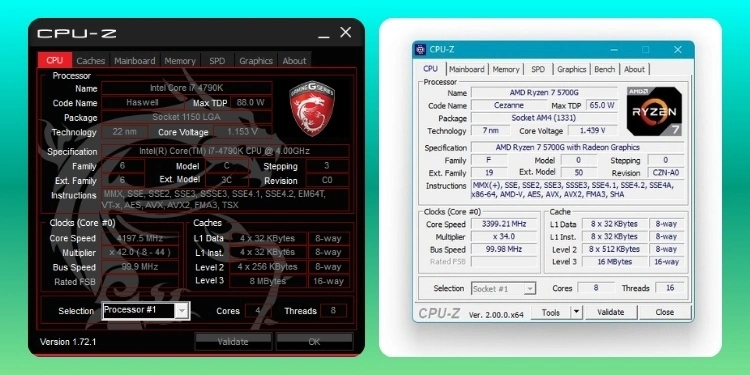
These include bus speed, installed memory capacity, BIOS program version, and plenty more electronics. Extensive information disclosure helps troubleshoot compatibility issues or understand overclocking headrooms on older systems.
Don’t be intimidated by numeric parameters outside your depth – focus initially on manufacturer and model fields. They alone adequately identify your motherboard. Refer back any time. Enhanced understanding or support proves helpful down the line.
CPU-Z sets the gold standard amongst third-party system report utilities. Only a download away, it is your best resource beyond Windows’ built-in mechanisms.
Physically Checking the Motherboard
If all else fails, no identification method proves more definitive than directly observing the motherboard. While limited to desktop PCs, this hands-on check is a last-resort verification.
- Before proceeding, fully power down the computer and unplug the power cable from safety. If discharged improperly, built-up static electricity can damage sensitive internal components.
- Gently flip the desktop onto its side with the rear ports facing up for easy accessibility. Loosen and remove any screws securing the case panel, which may either slide off or hinge open as a door depending on the model.
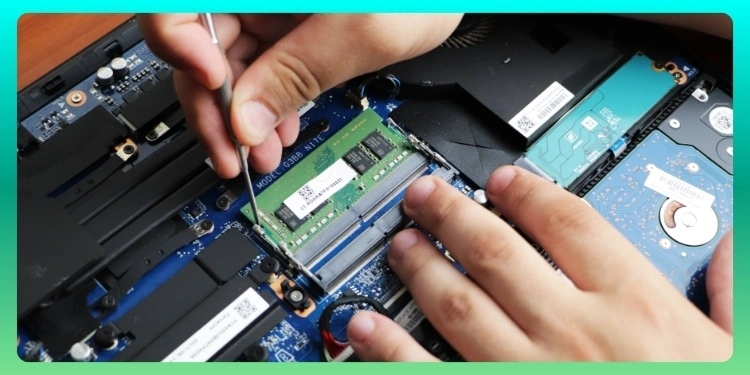
- Set aside the panel and visually inspect the motherboard immediately inside. It occupies the center of the chassis, crowded among other installed circuits and drives. Don’t be alarmed by its maze of miniature solder points and chips – focus on large printed text.
- The model name usually appears in the most pronounced font near RAM slots, CPU sockets, or chipset area. It commonly includes manufacturer branding followed by a sequential numeric letter code. Some entry-level boards list only this string without the maker.
Equipped with the motherboard model in hand, you now maintain definitive verification. Search it online with your PC or laptop to learn full specs and potential upgrade compatibility. Visual verification is also a reliable identification backup whenever software methods prove unreliable or unavailable.
Every computer user can uncover their motherboard identity with multiple straightforward techniques in two easy steps. They can apply this knowledge to optimize system performance or make informed component selections for future builds.
Read also:

