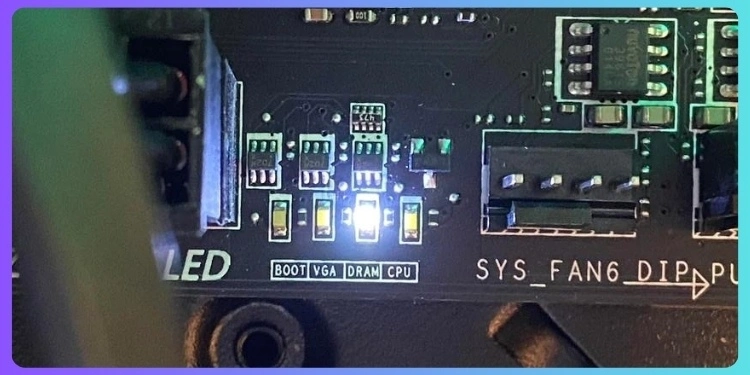
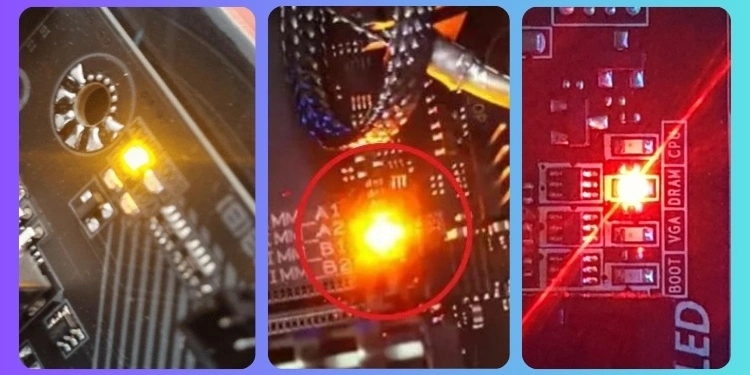
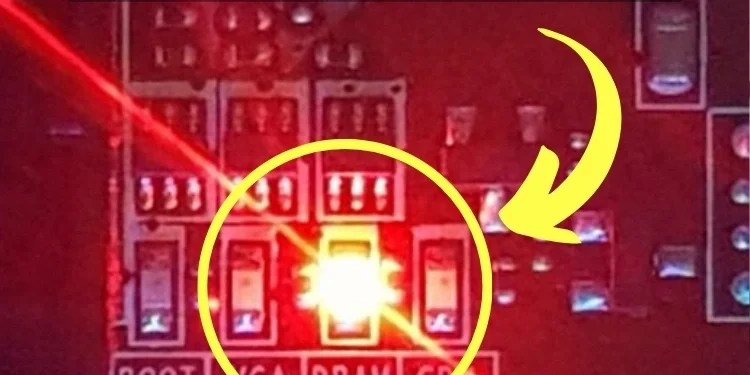
The DRAM light on a motherboard lets you know if there’s a problem with your computer’s memory, also called RAM. RAM stands for random-access memory, storing data and instructions so programs can run faster. When the DRAM light turns on, your motherboard can’t talk to the RAM properly.
Sometimes, dust or a loose connection can cause issues. Other times, a RAM module itself might be faulty. By learning more about what light means and some common causes, you can figure out how to fix it. Understanding the DRAM light on the motherboard is essential to get your computer running smoothly again.
Common Reasons the DRAM Light Comes On
The DRAM light turns on because your RAM modules aren’t firmly pushed into their slots. RAM needs a good connection to work. Remove each module and reseat it by pressing until it clicks into place.
Another cause could be incompatible or faulty RAM sticks. Not all RAM works with every motherboard. Check what your motherboard manual says it supports. You may need to replace the RAM if it’s not a good match.
Overclocking your CPU or RAM too aggressively can also lead to instability issues. If you’ve been overclocking, try resetting your BIOS or UEFI settings to default.
Outdated BIOS software might cause DRAM light problems if it needs to be updated. The latest version often improves RAM compatibility. It’s also possible that one of your RAM slots isn’t working correctly. Try moving RAM around one at a time in each slot.
Interpreting DRAM Light Colors
Motherboard brands use different colors for diagnostic lights, but here are some typical meanings:
- Red usually indicates a significant memory problem like faulty or incompatible RAM.
- Yellow or orange usually is less severe, perhaps pointing to loose connections or a minor setting issue.
- White may mean everything’s normal or needs further troubleshooting based on the motherboard.
Paying attention to colors helps narrow down where to start fixing things. Combined with the light’s location, you get good clues about what needs attention.
Troubleshooting the DRAM Light: A Step-by-Step Guide
Troubleshooting a lit DRAM light can be straightforward if you follow the proper steps. Here are some guidelines to help you resolve this issue effectively.
Check All Power Connections
It’s essential to start with the basics. Ensure all the power cables from the PSU (power supply unit) to the motherboard and RAM modules are firmly plugged in. Even a loose cable could cause mysterious issues to occur. Give each connector a gentle wiggle to verify it’s snugly in place. Pay special attention to the 24-pin motherboard power cable and 4-pin or 8-pin CPU power connector.
Remove and Reseat Each RAM Module
A RAM module must often be fully clicked into its slot, preventing proper communication. Gently but firmly lift back both retaining clips and slide out the stick. Then, line it up correctly before applying uniform pressure until it snaps securely back in. Repeat this process of taking out and putting back in each memory module individually.
Check RAM Compatibility
Ensure your RAM’s specifications, such as the amount of GB, speed measured in MHz or GHz, voltage, and heat spreaders, are entirely compatible with what your motherboard supports. Even slight differences can cause system instability. Confirm your setup is a supported configuration as per the motherboard manual.
Test Each RAM Stick Individually
With multiple RAM modules installed, systematically remove all but one to isolate variables. Boot with a single stick in the primary slot and check if the dram light remains off. Then, repeat by plugging in the other modules one at a time to pinpoint any troublemakers.
Reset BIOS to Factory Defaults
Sometimes, a reset can undo setting errors that confuse the motherboard. Consult your manual for the key combo, jumper cap location, or precise battery removal process required for your specific model. This clears all customizable options.

Identifying the Specific Issue Behind the DRAM Light
The location of the DRAM light provides valuable clues about the issue. Note where it appears during startup. This will help point to problems related to memory, CPU, GPU, or boot drives.
DRAM Light Near Boot Indicator
This indicator typically refers to problems with your boot drive, which holds the operating system files needed for your computer to start up. Possible causes are a defective or incorrectly installed hard disk, SSD, or boot device. Check all data cables are securely connected. You may also need to reinstall or repair your boot drive.
DRAM Light Near Graphics Indicator
It may indicate issues with your graphics card if it is near the GPU (graphics processing unit) indicator section. Ensure the video card is correctly plugged into its PCIe slot and receiving adequate power. In rare cases, a faulty GPU could trigger the light as well.
DRAM Light Near RAM Indicator
When near the location signifying system memory, it usually means one or more of your RAM modules are not functioning optimally. Carefully reseat each stick, paying attention to the retaining clips. If you find suspicious behavior, attempt booting with a single module. It could also suggest a damaged memory slot on the motherboard.
DRAM Light Near CPU Indicator
A light by the CPU label points to potential CPU problems, such as an improper installation in which the retaining arm isn’t fully locked. It could also arise from an overheating CPU fan not spinning correctly. Bent pins on the chip itself may disrupt connections, too. Inspect carefully if unable to isolate elsewhere.
Taking note of where on the motherboard a diagnostic light shows helps narrow the troubleshooting focus. By learning the typical issues associated with specific indicator locations, you have an excellent process for resolving problems quickly!

Additional DRAM Light Troubleshooting Techniques
If the DRAM light persists after basic steps, try some advanced techniques. Start by carefully inspecting CPU socket pins and thermal monitoring. Reducing non-essential components can also assist in troubleshooting.
Carefully Check CPU Socket Pins
Remove the CPU to scan for any malformed pins in its slot visually. This is a common point of failure that deserves close examination under light. Even a minor bend can cause intermittent faults. Reseat the CPU if you identify suspicious pins.
Incrementally Reduce Variables
If isolating one RAM module or swapping slots shows promise but doesn’t fully solve the problem, further simplify other components one by one. Removing non-essential add-on cards and then disconnecting secondary hard drives to reduce factors confusing the POST process.
Monitor Temperatures During Testing
Use hardware information software like CPUID HWMonitor to check that thermal readings stay within specs under load. Overheating CPUs or RAM can provoke protection mechanisms to turn on the light misleadingly. Consider reapplying thermal paste if needed.
Update All Drivers
Browse manufacturer websites to install the newest versions of drivers, such as chipset, audio, network, etc. Outdated software can sometimes cause odd behaviors that can be resolved with a refresh.
Contact Motherboard Support
Contact your motherboard brand’s technical representatives via phone, email, or online chat as a last resort. Provide specific model details so their knowledge can pinpoint unique quirks or push unreleased fixes not found elsewhere.
Documenting all actions methodically is invaluable if trouble persists and you need specialist guidance later on. Following these expanded tips, most faults clear up!


